Jellyfin (official)
Create /config and /cache
Give them permission for your user (here 998:100) as well as your media folders :
chown -R 998:100 /config
chown -R 998:100 /cache
etc...
Deploy
version: "3.5"
services:
  jellyfin:
    image: jellyfin/jellyfin
    container_name: jellyfin_off
    user: 998:100
    network_mode: "host"
    volumes:
      - /srv/path/Files/Jellyfin/config:/config
      - /srv/path/Files/Jellyfin/cache:/cache
      - /srv/path/Files/Jellyfin/tvshows:/tvshows
      - /srv/path/Files/Jellyfin/movies:/movies
      - /srv/path/Files/Jellyfin/docus:/docus
      - /srv/path/Music:/music
    restart: "unless-stopped"
    # Optional - alternative address used for autodiscovery
 #  environment:
    #  - JELLYFIN_PublishedServerUrl=http://example.com
Full HD h264 is the absolut maximum a Raspberry Pi 4 can handle for transcoding. Everything above must be played directly because the hardware isn't good enough.
https://www.reddit.com/r/jellyfin/comments/rqzecj/how_to_get_jellyfin_to_transcode_on_raspberry_pi_4/
FFmpeg Installation
Default Transoding options:
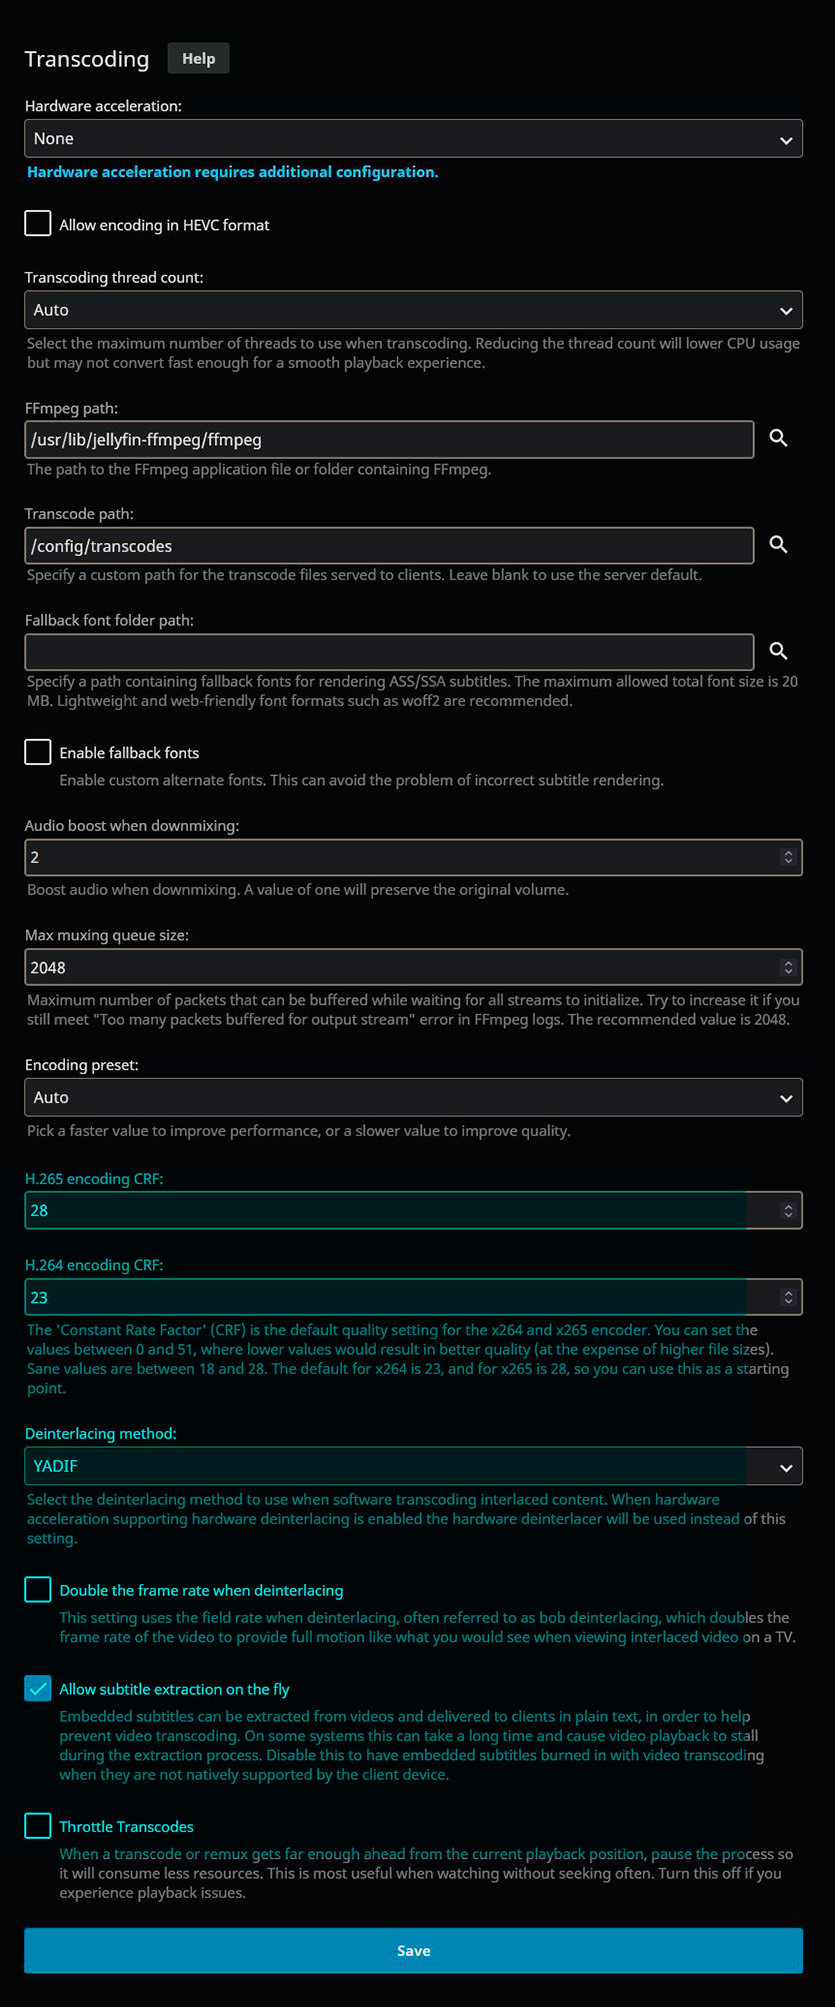
Alternative optimized Transcoding settings :
https://youtu.be/HIExT8xq1BQ?t=1249
KODI
Add-on Repository
There are two different Kodi add-ons that serve slightly different use cases.
- Jellyfin for Kodi - This add-on syncs metadata from selected Jellyfin libraries into the local Kodi database. This has the effect of making interacting with it feel very much like vanilla Kodi with local media (shows up under Movies/TV Shows on the home screen by default, virtually no delay, etc). However, it also tends to consume the database and not share well, so if you have local media or something else that interacts with the database directly, you will have conflicts and it will not be happy. The sync process can take some extra time on Kodi startup if you do not leave it running 24/7, but it is mostly in the background while Kodi is running.
- JellyCon - Behaves more like a standard Kodi streaming add-on. Media is accessed primarily by going through the Add-ons -> JellyCon menu, however you can set up menu options to link to it and show info on the home screen. It also allows easier switching between multiple Jellyfin servers or users since it doesn't have to rely on syncing all the metadata down. By not having metadata synced, it has to request info from the server which can take a bit more time when you are browsing (typically only a second or two in my testing), but you don't have to wait for the database to sync or keep it up to date.
Install Add-on Repository
The most convenient install method of our Jellyfin add-ons is to use the official Kodi Jellyfin Repository. Using this repository allows for easy install of our add-ons, as well as automatically keeping the add-ons up to date with the latest version. Any other Jellyfin related add-ons that may be built in the future will also be available here.
The installation method for the repository varies depending on what kind of device you're using, outlined below.
General Use Devices (PCs and Tablets)
- Download the repository installer found here.
- It will be saved as
repository.jellyfin.kodi.zip
- It will be saved as
- Install the Jellyfin repository.
- Open Kodi, go to the settings menu, and navigate to "Add-on Browser"
- Select "Install from Zip File"
- If prompted, enter settings and enable "Unknown Sources", then go back to the Add-on Browser
- Select the newly downloaded file and it will be installed
"Embedded" Devices (Android TV, Firestick, and other TV Boxes)
- Open Kodi, go to the settings menu, and navigate to "File manager"
- Select "Add source"
- In the text box, enter
https://kodi.jellyfin.org - Enter a name for the data source, such as "Jellyfin Repo" and select Ok
- From the settings menu, navigate to "Add-on Browser"
- Select "Install from Zip File"
- If prompted, enter settings and enable "Unknown Sources", then go back to the Add-on Browser
- Select the data source you just added
- Install
repository.jellyfin.kodi.zip
- Select "Install from Zip File"
Jellyfin for Kodi
It is highly recommended to install the Kodi Sync Queue plugin into the Jellyfin server as well. This will keep your media libraries up to date without waiting for a periodic re-sync from Kodi.
Remote Kodi databases, like MySQL, are not supported. A local SQLite database is required (this is the default).
Jellyfin for Kodi Overview
This add-on syncs metadata from selected Jellyfin libraries into the local Kodi database. This has the effect of making interacting with it feel very much like vanilla Kodi with local media (shows up under Movies/TV Shows on the home screen by default, virtually no delay, etc). However, it also tends to consume the database and not share well, so if you have local media or something else that interacts with the database directly, you will have conflicts and it will not be happy. The sync process can take some extra time on Kodi startup if you do not leave it running 24/7, but it is mostly in the background while Kodi is running.
Media in Kodi's database is automatically kept in sync with the server in one of several ways:
- Startup sync - Each time Kodi starts, it will reach out to the Kodi Sync Queue plugin in the server and request all updated media since its last check-in time (when Kodi was last shut down).
- Live sync - This happens while Kodi is running. When the server updates an item, it will send a notification to Kodi over a websocket connection that it has new media that needs to be updated.
Install Jellyfin for Kodi Add-on
- Install Jellyfin for Kodi.
- From within Kodi, navigate to "Add-on Browser"
- Select "Install from Repository"
- Choose "Kodi Jellyfin Add-ons", followed by "Video Add-ons"
- Select the Jellyfin add-on and choose install
- Within a few seconds you should be prompted for your server details.
- If a Jellyfin server is detected on your local network, it will displayed in a dialog
- If a Jellyfin server is not detected on your local network, select "Manually Add Server". Enter your server info into the text field.
- Enter the server name or IP address and the port number (default value is 8096)
- Host:
192.168.1.10:8096
- Host:
- If using SSL and a reverse proxy, enter the full URL in the "Host" field
- Host:
https://jellyfin.example.com
- Host:
- Note that if you have a baseurl set, you should append that value to the end of the host field.
- Host:
192.168.0.10:8096/jellyfin
- Host:
- Enter the server name or IP address and the port number (default value is 8096)
- Select user account and input password, or select "Manual Login" and fill in your user information
- Once you are successfully authenticated with the server, you'll be asked about which mode you'd like to use, Add-on vs Native, which are outlined below.
Add-on Mode
Add-on mode uses the Jellyfin server to translate media files from the filesystem to Kodi. This is the default setting for the add-on, and is sufficient for most use cases. It will work both on the local network and over the Internet through a reverse proxy or VPN connection. Providing network speed is sufficient, Kodi will direct play nearly all files and put little overhead on the Jellyfin server.
To use Add-on mode, simply choose "Add-on" at the dialog and proceed to Library Syncing
Native Mode
Native mode accesses your media files directly from the filesystem, bypassing the Jellyfin server during playback. Native mode needs more setup and configuration, but it can, on rare occasions, lead to better performance where network bandwidth is a limitation. It requires your media to be available to the device Kodi is running on over either NFS or Samba, and therefore should only be used on a LAN or over a VPN connection.
To use Native mode, first set up your libraries in Jellyfin with a remote path.
- In the Jellyfin server, navigate to the Libraries section of the admin dashboard.
- Select an existing library (or create a new one)
- Select the media folder
- Enter the path to your network share in the "Shared network folder" textbox
- Possible formats:
- NFS
nfs://192.168.0.10:/path/to/media
- Samba
- Guest User -
\\192.168.0.10\share_name - Custom User (Not Recommended) -
\\user:password@192.168.0.10\share_name- It's more secure to use the generic Guest mapping here and specify credentials from within Kodi
- Guest User -
- Mounted share
- If you have mounted your network share, you can reference the local mount point. This can be more performant but generally means it only works for one type of operating system, given the difference between the file systems
/mnt/media(Linux)Z:\media(Windows)/Volumes/media(Mac OS)
- If you have mounted your network share, you can reference the local mount point. This can be more performant but generally means it only works for one type of operating system, given the difference between the file systems
- NFS
- Configure libraries in Kodi
- Skip the initial library selection. We need to add file shares to Kodi first
- Within Kodi, navigate to the settings menu and select "File manager"
- Select "Add source"
- Select "Browse" and "Add network location"
- Create either a NFS or SMB location from the selection box and fill in the necessary information about your network share
- If you are using a mounted share, browse to the mount point on your file system rather than the network share
- Select your newly created location and choose "Ok"
- Give your media source a name and choose "Ok"
- Go to Add-ons -> Jellyfin -> Manage Libraries -> Add Libraries
- Proceed to Library Syncing
Library Syncing
This screen allows you to choose which libraries to sync to your Kodi install. This process will copy metadata for your media into the local Kodi database, allowing you to browse through your media libraries as if they were native to your device.
Either choose "All" or select individual libraries you would like synced and select OK. Syncing the metadata will start automatically. The duration of this process varies greatly depending on the size of your library, the power of your local device, and the connection speed to the server.
You can still access any libraries that have not been synced by going through the Jellyfin add-on menu. These unsynced libraries will be labeled as "dynamic."
If an error occurs during syncing, enable debug logging in the Jellyfin add-on in Kodi and if in a Unix-like OS, set the log level of Samba to 2 to see if there are issues authenticating.
KODI PLAYBACK SPEED
An add-on to add variable playback speed in the menu : https://znedw.github.io/kodi.repository/repo/
INTRO SKIPPER
https://github.com/intro-skipper/intro-skipper/wiki/Installation#step-1-install-the-plugin
No comments to display
No comments to display