General knowledge.
Usually some generic and basic knowledge that should be known using debian.
- How to schedule a script to run every x days at x:00
- How to embed external subtitles in a video file using mkvtoolnix.
- Install gh Github CLi
- How to run Bashtop on Debian
- How to create a dockerfile.
- How to create a bot that publishes the daily top post of a subreddit to a Discord channel.
- How to create a bot that publishes the daily top post of a subreddit to a Discord channel (Docker).
- Mount an SMB share.
- Mount an NFS share.
- Export Docker Container Settings as Docker Compose Stack
- Nextcloud on Oracle free tier.
- Grant Password, root access via SSH
- Build an image from a DockerFile and push it to DockerHub.
- Merge ans deduplicate domains in a blocklist
- Add geo-location based access rules to Nginx Proxy Manager
- Update portainer Business
- How do I know which container takes up the most resources in docker? Comment savoir quel conteneur prend le plus de ressources dans docker ?
- Build a container
- Force DNS change.
- Créer un bot Discord pour nettoyer automatiquement les canaux d'un serveur.
- Use scp to copy a file and a directory from one machine to another:
- Gestion Automatisée des Conteneurs Docker avec Timeout et Recréation / Automated Docker Container Management with Timeout and Auto-Recreation
- Automatiser la Synchronisation entre Deux Serveurs avec rsync et SSH
- Automatiser la Synchronisation entre Deux Serveurs avec rsync et SSH AVEC VERSIONING
- Liste des sous dossiers d'un dossier en .txt sous windows
- Synchroniser automatiquement Radicale et Nextcloud avec un script Bash
- How to Rename a File Using Its Inode on Debian
How to schedule a script to run every x days at x:00
To schedule a script to run automatically at a specific time in Debian, you can use the cron utility. cron is a built-in Linux utility that allows you to schedule tasks to run automatically at a specified time or interval.
To schedule a script to run at a specific time using cron, you will need to edit the crontab file for the user that will be running the script. The crontab file is a configuration file that contains a list of tasks that cron will run automatically.
To edit the crontab file, you can use the crontab -e command. This will open the crontab file in a text editor, where you can add a new entry to schedule your script to run.
For example, to schedule a script called "myscript.sh" to run every day at 8:00 AM, you can add the following entry to the crontab file:
0 8 * * * /path/to/myscript.sh
This entry tells cron to run the script at 8:00 AM every day. The 0 8 * * * part of the entry specifies the time and date that the script should be run. The /path/to/myscript.sh part specifies the path to the script that should be run.
Once you have added the entry to the crontab file, you can save and exit the file. cron will automatically run the script at the specified time.
It's important to note that the crontab file uses a specific format for specifying the time and date when a script should be run. The first five fields in the entry specify the minute (0-59), hour (0-23), day of the month (1-31), month (1-12), and day of the week (0-6, with 0 being Sunday) when the script should be run. The last field is the command that should be run.
For more information on the crontab file and how to use it to schedule tasks, you can refer to the crontab man page by running the following command:
man crontabHow to embed external subtitles in a video file using mkvtoolnix.
Basic use
First, make sure that mkvmerge is installed on your system by running the following command:
apt-get install mkvtoolnixThen, use the following mkvmerge command to add the subtitle file to the movie file:
mkvmerge -o output.mkv movie.mp4 subtitle.srtIn this command, "output.mkv" is the output movie file with the subtitles embedded, "movie.mp4" is the input movie file, and "subtitle.srt" is the input subtitle file.
Further customization
You may set the language and name of each subtitle track:
mkvmerge -o output.mkv input.mp4 \
    --language 0:en --track-name 0:English english_subtitles.srt
    --language 0:es --track-name 0:Español spanish_subtitles.srt
Note that we used for both languages the same track ID (0:), which corresponds to the input video track.
The --language needs to be properly encoded. You can list all allowed ISO 639-2 and ISO 639-1 codes with:
mkvmerge --list-languagesOther useful features
You may also set the title of the output video with:
--title "Your title"We can check how all subtitles were added to the output:
$ mkvmerge -i output.mkv
File 'output.mkv': container: Matroska
Track ID 0: video (MPEG-4p10/AVC/H.264)
Track ID 1: audio (AAC)
Track ID 2: subtitles (SubRip/SRT)
Track ID 3: subtitles (SubRip/SRT)
If you really want to "burn" the subtitles in the video, you may use ffmpeg instead.
Install gh Github CLi
apt install gh -y
then
gh auth loginHow to run Bashtop on Debian
To install :
Bashtop is available in Azlux’s repository as well as Debian repository and all you need is to download the Debian package and install it as shown:
$ wget http://packages.azlux.fr/debian/pool/main/b/bashtop/bashtop_0.9.25_all.deb

$ sudo dpkg -i bashtop_0.9.25_all.deb
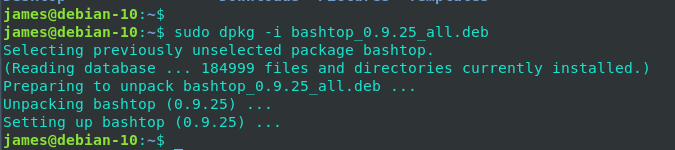
To run, just run :
bashtopTo uninstall :
sudo apt-get remove bashtopIf you want to remove the package and its dependencies that are no longer needed, you can use the following command:
sudo apt-get remove --auto-remove bashtopFinally, to remove any dependencies that were installed with bashtop, run the following command:
sudo apt autoremove
It's always a good idea to double-check the name of the package you want to remove before running the command to avoid accidentally removing the wrong package. You can use the dpkg -l command to list all installed packages on your system.
How to create a dockerfile.
To create a new Dockerfile, follow these steps:
- Open a text editor of your choice (such as Nano, Vim, or Sublime Text).
- Create a new file and save it as "Dockerfile" in your project directory.
- Copy and paste the contents of the Dockerfile template into the new file.
- Customize the Dockerfile for your specific application by modifying the base image, installing required dependencies, copying application files, exposing ports, and defining the command to run.
- Save the Dockerfile
Here's an example of how to create a Dockerfile using Nano on a Debian-based system:
- Open a terminal window.
- Navigate to your project directory using the
cdcommand. - Type
nano Dockerfileto create a new file named "Dockerfile" using Nano. - Copy and paste the contents of the Dockerfile template into the new file.
- Customize the Dockerfile as needed using the Nano editor.
- Press
Ctrl+Oto save the Dockerfile, and then pressCtrl+Xto exit Nano.
How to create a bot that publishes the daily top post of a subreddit to a Discord channel.
To create a bot that publishes the daily top post of a subreddit to a Discord channel, you can follow these general steps:
-
Create a new bot account on Discord by going to the Discord Developer Portal, creating a new application, adding a bot to the application, and then copying the bot's token.
-
Install the required Python libraries, including
discord.py,praw(Python Reddit API Wrapper), anddatetime. -
Write a Python script that authenticates the bot using its token, connects to the appropriate Discord server and channel, and retrieves the daily top post of a subreddit using the
prawlibrary. -
Schedule the script to run once per day using a tool like
cronorTask Scheduler.
Here's an example script that retrieves the daily top post of the "AskReddit" subreddit and posts it to a Discord channel:
import discord
import praw
import datetime

# Discord bot token
TOKEN = "your-bot-token-here"

# Reddit API credentials
reddit = praw.Reddit(
    client_id="your-client-id-here",
    client_secret="your-client-secret-here",
    user_agent="your-user-agent-here"
)

# Subreddit to retrieve top post from
SUBREDDIT = "AskReddit"

# Discord server and channel to post to
SERVER_ID = "your-server-id-here"
CHANNEL_ID = "your-channel-id-here"

# Get today's date in the format "MM/DD/YYYY"
today = datetime.datetime.now().strftime("%m/%d/%Y")

# Get the top post of the day from the subreddit
top_post = reddit.subreddit(SUBREDDIT).top(time_filter="day", limit=1).__next__()

# Build the message to post to Discord
message = f"**Top post on r/{SUBREDDIT} for {today}:**\n\n{top_post.title}\n\n{top_post.url}"

# Authenticate the Discord bot using its token
client = discord.Client()

@client.event
async def on_ready():
    # Get the Discord server and channel to post to
    server = client.get_guild(SERVER_ID)
    channel = server.get_channel(CHANNEL_ID)

    # Post the message to the Discord channel
    await channel.send(message)

# Run the Discord bot
client.run(TOKEN)How to create a bot that publishes the daily top post of a subreddit to a Discord channel (Docker).
1 - Create a new Dockerfile in your project directory:
FROM python:3.9-slim-buster

WORKDIR /app

COPY requirements.txt .

RUN pip install --no-cache-dir -r requirements.txt

COPY . .

CMD [ "python", "bot.py" ]
This Dockerfile uses the official Python 3.9 image as a base, sets the working directory to /app, copies the requirements.txt file, installs the required packages, copies the rest of the files in the directory, and runs the bot.py script when the container starts.
2 - Create a docker-compose.yml file in your project directory:
version: '3'

services:
  bot:
    build: .
    environment:
      - DISCORD_TOKEN=<your-bot-token>
      - REDDIT_CLIENT_ID=<your-reddit-client-id>
      - REDDIT_CLIENT_SECRET=<your-reddit-client-secret>
      - REDDIT_USER_AGENT=<your-reddit-user-agent>
      - DISCORD_SERVER_ID=<your-discord-server-id>
      - DISCORD_CHANNEL_ID=<your-discord-channel-id>
      - SUBREDDIT=<your-subreddit-name>
restart: alwaysdocker-compose.yml file defines a service named bot that builds the Docker image from the current directory, sets environment variables for the bot token, Reddit API credentials, Discord server and channel IDs, and subreddit name, and restarts the container if it crashes or stops.3 - Create a requirements.txt file in your project directory with the following contents:
discord.py
praw
This file specifies the required Python packages for the bot to run.
4 - Modify your bot.py script to use environment variables for the bot token, Reddit API credentials, Discord server and channel IDs, and subreddit name, like this:
import os
import discord
import praw
import datetime

# Discord bot token
TOKEN = os.environ["DISCORD_TOKEN"]

# Reddit API credentials
REDDIT_CLIENT_ID = os.environ["REDDIT_CLIENT_ID"]
REDDIT_CLIENT_SECRET = os.environ["REDDIT_CLIENT_SECRET"]
REDDIT_USER_AGENT = os.environ["REDDIT_USER_AGENT"]

reddit = praw.Reddit(
    client_id=REDDIT_CLIENT_ID,
    client_secret=REDDIT_CLIENT_SECRET,
    user_agent=REDDIT_USER_AGENT
)

# Subreddit to retrieve top post from
SUBREDDIT = os.environ["SUBREDDIT"]

# Discord server and channel to post to
SERVER_ID = int(os.environ["DISCORD_SERVER_ID"])
CHANNEL_ID = int(os.environ["DISCORD_CHANNEL_ID"])

# Get today's date in the format "MM/DD/YYYY"
today = datetime.datetime.now().strftime("%m/%d/%Y")

# Get the top post of the day from the subreddit
top_post = reddit.subreddit(SUBREDDIT).top(time_filter="day", limit=1).__next__()

# Build the message to post to Discord
message = f"**Top post on r/{SUBREDDIT} for {today}:**\n\n{top_post.title}\n\n{top_post.url}"

# Authenticate the Discord bot using its token
client = discord.Client()

@client.event
async def on_ready():
    # Get the Discord server and channel to post to
    server = client.get_guild(SERVER_ID)
    channel = server.get_channel(CHANNEL_ID)

    # Post the message to the Discord channel
    await channel.send(message)

# Run the Discord bot
client.run(TOKEN)
5 - Start the Docker
You can then use the docker build . command to build a Docker image from the Dockerfile in your work directory.
You would be able to see your docker images by the below command:
docker imagesWithout a name, just using the ID:
docker run -i -t 8dbd9e392a96 /bin/bashCreating a discord bot and getting a token.
How to get client_id and client_secret.
Discord Channel ID
Mount an SMB share.
You nee the helper program installed for either the nfs or cifs file system. For nfs based file system, following utility is required
sudo apt-get install nfs-commonTo mount a Cifs file system, install the following utility
sudo apt install cifs-utilsThen mkdir /mnt/folder and :
sudo mount -t cifs //machineNameOrIPadress/folder /mnt/folder -o username=myusername,password=mypasswordYou might want to add puid:pgid to make it writable, eg: 998:100
sudo mount -t cifs //machineNameOrIPadress/folder /mnt/folder -o username=myusername,password=mypassword,uid=998,gid=100Example, where Video is the SMB share physically located at /srv/devdiskbyuuid.../Video
sudo mount -t cifs //orbiter/Video/ /mnt/OrbiterVideo -o username=root,password=omgstrongpassword,uid=998,gid=100Edit fstab to automounnt after a reboot.
nano /etc/fstabAdd this to fstab - hardcoded credentials option.
//[IPADDRESS]/[SHARENAME] /mnt/[SHARENAME]/ cifs username=[SMBUSER],password=[SMB PASSWORD],iocharset=utf8,noperm,uid=1000,gid=1000 0 0i.e:
//orbiter/Video /mnt/OrbiterVideo/ cifs username=root,password=password,iocharset=utf8,noperm,uid=998,gid=100 0 0Here's a breakdown of the options you have specified in the fstab entry:
//orbiter/Video: This is the network location of the CIFS share you want to mount./mnt/OrbiterVideo/: This is the mount point where you want to access the CIFS share.cifs: This is the filesystem type you want to mount. In this case, it is a CIFS share.username=root,password=password: This specifies the username and password you want to use to access the CIFS share. Replace "root" and "password" with your actual username and password.iocharset=utf8: This specifies the character set to use for filename encoding.noperm: This option prevents permission checks on the CIFS share, allowing any user to access it.uid=998,gid=100: This sets the user ID and group ID for the mount point. Replace "998" and "100" with the actual user and group IDs you want to use.0 0: These are the mount options. The first "0" indicates that the file system should not be backed up by the dump utility. The second "0" indicates that the file system should not be checked by the fsck utility at boot time.
To unmount an SMB share, you can use the umount command followed by the mount point directory. Here's an example:
sudo umount /mnt/folderTo force:
sudo umount -a -t cifs -l
I have not done it yet, so I cannot give you a walkthrough, but you should visit the *arr wiki and Ibracorp's site/yt content for ideas and instructions. If you are not using any Windows machines you will probably be better served with NFS protocol for shares, but if you intend to share the folders with Windows machines too, then CIFS/Samba might be a better solution.
You should read about hard links, but you should also read why some suggest avoiding the use of hard links and make your own decision if you wish to do it. Basically, a hard link makes a pointer to a file on the level of a file system. You can have multiple pointers to the same file from various folders without having spent any additional space. It is as if the file was mounted in different folders. The alternative to a hard link is a soft link that functions more like a shortcut, so if you change the location of the file or its name it will get defunct.
To permanently add bind mounts there is an option to add them to fstab list. Because mounts added to the system get unmounted on system reset, so to have them automount you have to add them to the list. The other thing, there is an option for
mountto add a credentials file for mounts and to reference the file in the mount command instead of having to write the credentials manually every time you mount some folder.
Make sure to create a directory for the mountpoint on the target server.
mkdir /mnt/[SHARENAME]Add this to fstab - hardcoded credentials option.
//[IPADDRESS]/[SHARENAME] /mnt/[SHARENAME]/ cifs username=[SMBUSER],password=[SMB PASSWORD],iocharset=utf8,noperm,uid=1000,gid=1000 0 0OR
//[IPADDRESS]/[SHARENAME]
 /mnt/[SHARENAME] cifs
credentials=/home/[YOURUSER]/.smbcredentials,iocharset=utf8,noperm,uid=1000,gid=1000
 0 0
Then store your credentials in home/[YOURUSER]/.smbcredentials like this:
user=[SMBUSER]
password=[SMBPASS]Secure your credentials using
chmod 0600 ~/.smbcredentials
Mount an NFS share.
First, create an NFS Share on your host
With OMV for example.
## Installing NFS Client Packages
To mount an NFS share on a Linux system first you’ll need to install the NFS client package. The package name differs between Linux distributions.
Installing NFS client on Ubuntu and Debian:
sudo apt update
sudo apt install nfs-common
Manually Mounting an NFS File Systems
Mounting a remote NFS share is the same as mounting regular file systems.
To mount an NFS file system on a given mount point, use the mount command in the following form:
```bash mount [OPTION...] NFS_SERVER:EXPORTED_DIRECTORY MOUNT_POINT ```
Use the steps below to manually mount a remote NFS share on your Linux system:
-
First, create a directory to serve as the mount point for the remote NFS share:
sudo mkdir /mnt/OrbiterVideo
Mount point is a directory on the local machine where the NFS share is to be mounted.
Where orbiter is the LAN Name of the NFS server, /Video is the directory that the server is exporting and /mnt/OrbiterVideo is the local mount point.
Can be with IP adress
``` sudo mount -t nfs 10.10.0.10:/Video /mnt/OrbiterVideo ```
Automatically Mounting NFS File Systems with /etc/fstab
nano /etc/fstab
Add line
orbiter:/Video /mnt/OrbiterVideo nfs defaults 0 0
Unmounting NFS File Systems
The umount command detaches (unmounts) the mounted file system from the directory tree.
To detach a mounted NFS share, use the umount command followed by either the directory where it has been mounted or remote share:
umount orbiter:/Video
#or
umount /mnt/OrbiterVideo
Permission problems ?
sudo chown -R root:root path/to/Video
sudo chmod -R 755 path/to/Video
Extensive explications from ChatGPT
To address this "Permission denied" error, let’s go through a few key steps to ensure your NFS share is correctly configured for root-level access between your two Debian machines.
Steps to Resolve "Permission Denied" Error:
1. Verify NFS Export Permissions on the Server Side On the NFS server (the machine hosting the /Video folder), make sure the directory is exported with the correct permissions in /etc/exports. Add or update the relevant line in /etc/exports to ensure the client machine has both read and write permissions and that root squashing is disabled.
/Video *(rw,no_root_squash,sync)
- rw: Allows read and write access.
- no_root_squash: Allows the root user on the client to maintain root privileges on the share.
- sync: Ensures changes are committed to disk before reporting success. After updating
/etc/exports, apply the changes by running:
sudo exportfs -ra
2. Restart the NFS Service Restart the NFS server to apply any configuration changes:
sudo systemctl restart nfs-kernel-server
3. Mount the NFS Share on the Client Side Ensure the client machine mounts the NFS share with the correct permissions. Since an entry was added in /etc/fstab, remount it with:
sudo mount -a
Alternatively, mount manually for testing:
sudo mount -t nfs orbiter:/Video /mnt/OrbiterVideo
4. Check Ownership and Permissions on the NFS Share On the NFS server, ensure that the /Video directory has permissions allowing the root user on the client to write to it.
sudo chown -R root:root /Video
sudo chmod -R 755 /Video # Adjust permissions as needed
5. Test File Creation After mounting, try creating a file in /mnt/OrbiterVideo on the client as the root user:
sudo touch /mnt/OrbiterVideo/testfile
Additional Troubleshooting Tips
- If permission issues persist, re-check
root_squashsettings and permissions on the/Videodirectory. - Ensure both machines synchronize UID/GID settings if user-level permissions are required.
Export Docker Container Settings as Docker Compose Stack
You can use this tool from a docker container by either cloning this repo and building the image or using the automatically generated image on GitHub
Pull the image from GitHub (supports both x86 and ARM)
docker pull ghcr.io/red5d/docker-autocompose:latestUse the new image to generate a docker-compose file from a running container or a list of space-separated container names or ids:
docker run --rm -v /var/run/docker.sock:/var/run/docker.sock ghcr.io/red5d/docker-autocompose <container-name-or-id> <additional-names-or-ids>...To print out all containers in a docker-compose format:
docker run --rm -v /var/run/docker.sock:/var/run/docker.sock ghcr.io/red5d/docker-autocompose $(docker ps -aq)Nextcloud on Oracle free tier.
Prerequisite
You'll need an account at https://cloud.oracle.com/ and a domain name.
Server Setup
Get started > Launch ressources > create a VM instance
Name the instance
Change image to Cannonical Ubuntu 20.04
Change shape to Ampere, increase CPU and RAMCreate SSH key with Putty or Mobaxterm.
Copy the SSH key and save private and public key to a folder on computer.
Paste key in filed in Oracle.
Specify a custom boot volume. Oracle free tier offers 200Go space.
Hit create, and create again.
Copy public ip address
Go to your domain DNS manager
Add A Record, host: @, IP: oracle public ip address
Add A Record, host: hcp, IP: oracle public ip address
Add A Record, host: cloud (or whatever), IP: oracle public ip address
Go to putty
ubuntu@ipaddress
SSH > Auth > Private key path
Save and open
Control Panel Install
Change to sudo
sudo su -
Get the install script
wget https://raw.githubusercontent.com/hestiacp/hestiacp/release/install/hst-install.sh
Important - CHANGE THE NEXT LINE TO USE YOUR OWN DETAILS, recommend using a subdomain like 'hcp' for your panel as I've done here
bash hst-install.sh --interactive no --email admin@example.com --password exampledemopassword --hostname hcp.example.com -f
It takes 10 to 15 minutes top complete. So take the exstra time to setup ports. You'll reboot after the install.
Ports setup
Go to Oracle dashboard > Virtual Cloud Network > Subnet > Default Security List > Add Ingress Rules
Source CIDR is : 0.0.0.0/0
Designated port range : 8083,80,443,143,993,110,995,25,465,587
Description : Hestia
> Add ingress rules
Nextcloud Install
Once Hestia is installed, scroll up and copy creditentials
reboot
Then go to hcp.yourdomain.tld:8083
Use creditentials admin exampledemopassword
Create new user
Login as new user
Add Web domain
cloud.yourdomain.tld
Edit
Enable SSL, Use let's encrypt, enable HTTPS, Enable HSTS
Save
Click on domain name > Quick install app > Nextcloud > fill creditentials > install
PHP Settings
Log back to admin in Hestia > Settings (top right corner) > Configure > Web server > Click pencil > Configure PHP
max_execution_time
| 300 |
max_input_time
| 600 |
memory_limit
| 512M |
post_max_size
| 100M |
upload_max_filesize
| 2000M |
Then, save
Go to cloud.yourdomain.tld and you're setup 😊
Grant Password, root access via SSH
cd /etc/ssh/sshd_config file:
-
To enable password authentication, uncomment
#PasswordAuthentication yes -
To enable root login, uncomment
#PermitRootLogin yes -
To enable SSH key login, uncomment
#PubkeyAuthentication yes
#AuthorizedKeysFile .ssh/authorized_keys
Build an image from a DockerFile and push it to DockerHub.
How to log into your Docker Hub account
We have to log into our Docker Hub account to push the new image. To successfully log into Docker Hub from the command line, you must first create an access token. Log in to Docker Hub and click your profile image. From the popup menu, select Account Settings. On the resulting page, click Security in the left navigation and then click New Access Token (Figure A).
Figure A

Once you’ve generated the access token, copy it to your clipboard. Go back to the terminal window and issue the command:
docker login -u NAME
Where NAME is your Docker Hub username. You will be prompted for your Docker Hub password, where you’ll use the access token you just generated.
How to build your image
It’s time to build our image. We’re going to name the image trtest. To do this, issue the command:
docker build -t trtest .
When the build completes, you’ll have a new image, named trtest.
How to tag and push the image
Finally, we’re going to tag our new image and then push it to Docker Hub. First tag the image with :latest using the command:
docker image tag trtest USER/trtest:latest
Where USER is your Docker Hub username.
Now that the image is tagged, we can push it to Docker Hub with:
docker image push USER/trtest:latest
Where USER is your Docker Hub username.
When the push completes, you should find the trtest:latest image in your Docker Hub repository.
And that’s all there is to building a Docker image and pushing it to your Docker Hub repository.
Merge ans deduplicate domains in a blocklist
Use WGET to download lists, then combine them into a single large file, and finally create a new file with no duplicates by using “awk '!visited[$0]++'”
wget URL1 URL2 URL3 cat *.txt > all.txt (This overwrites all.txt)
awk '!visited[$0]++' all.txt > no_duplicates.txt
Or use chatgptlol
Add geo-location based access rules to Nginx Proxy Manager
Nginx Proxy Manager Geo-Location Based Access Rules
This project allows running a python script that adds geo-location based access rules to Nginx Proxy Manager using free IP location data from db-ip (their free data is updated monthly but is not as complete as the commercial version). The script loads IP location data from either a local CSV file or it can download from db-ip.com directly.
Usage
python add-npm-geofilter.py --npm-host <npm_host> --npm-port <npm_port> --npm-email <npm_email> --npm-password <npm_password> --npm-accesslist-name <npm_accesslist_name> --allowed-countries <allowed_countries> [--ip-list-file <ip_list_file>]
--npm-host: The host or IP address of the Nginx Proxy Manager instance to connect to (required)--npm-port: The admin port of the Nginx Proxy Manager instance (required)--npm-email: The email address of an admin user in the Nginx Proxy Manager instance (required)--npm-password: The password of the admin user in the Nginx Proxy Manager instance (required)--npm-accesslist-name: The name of the access list to add the rules to (required)--allowed-countries: A comma-separated list of country codes to allow (required)--ip-list-file: The path to the CSV file containing the IP location data (optional, if not provided, data will be fetched from db-ip.com)
Updates
Each time you run the script without specifying an IP List file, it will attempt to fetch the latest one (from the current month). You can use an automation (Cron Job) to have this run once a month and make sure your access rule is running with the most updated IPs
Output
The script will output the number of filtered entries and a success message if the access rules were added successfully. Any errors encountered during the process will be printed to the console.
Update portainer Business
docker rm portainerdocker stop portainerdocker pull portainer/portainer-ee:latest docker run -d -p 8000:8000 -p 9000:9000 --name=portainer --restart=always -v /var/run/docker.sock:/var/run/docker.sock -v portainer_data:/data portainer/portainer-ee:latestHow do I know which container takes up the most resources in docker? Comment savoir quel conteneur prend le plus de ressources dans docker ?
There are several ways to identify the resource hog among your Docker containers. Here's a breakdown of methods you can use:
1. Using the docker stats command:
This is a built-in command that provides real-time resource usage information for running containers. Run the following command in your terminal:
docker stats
This will display a table with details for each running container, including its ID, name, image, CPU, memory, network, and block I/O utilization. Sort the table by any column (e.g., CPU % or MEM %) to see which container is at the top.
2. Leverage the docker top tool:
Similar to the Linux top command, docker top shows the processes running within a specific container, sorted by CPU usage. To use it, enter:
docker top <container_id>
Replace <container_id> with the actual ID of the container you want to inspect. This helps identify processes consuming the most CPU within that container.
3. Exploring the Docker API:
The Docker API offers an endpoint to retrieve container resource usage details. You'll need to call the /stats endpoint. Refer to the official Docker documentation for in-depth information on using the API for container monitoring: https://docs.docker.com/reference/cli/docker/container/stats/
4. Third-party monitoring tools:
Several monitoring tools can help you keep track of Docker container resource usage. These tools provide a more comprehensive view of resource utilization and offer additional features like alerts and reports. Some popular options include:
- Prometheus: https://cloud.ibm.com/docs/monitoring?topic=monitoring-prometheus-exporters
- Grafana: https://grafana.com/docs/grafana/latest/
- Datadog: https://docs.datadoghq.com/
- New Relic: https://newrelic.com/
Additional Tips:
- Define resource limits (CPU and memory) during container creation to restrict the resources a container can consume.
- Use
docker psto view a list of running containers along with their current CPU and memory usage. - Include the
-aoption withdocker statsto see information for all containers, including paused or stopped ones.
By using these methods, you can effectively pinpoint the container that's consuming the most resources on your system and take necessary actions to optimize resource allocation.
Il existe plusieurs façons de savoir quel conteneur Docker consomme le plus de ressources. Voici quelques méthodes :
1. Utiliser la commande docker stats
La commande docker stats fournit des informations en temps réel sur les ressources utilisées par chaque conteneur en cours d'exécution. Pour l'exécuter, entrez la commande suivante dans votre terminal :
docker stats
Cette commande affichera un tableau contenant des informations sur chaque conteneur en cours d'exécution, y compris son ID, son nom, son image, son état, son utilisation du CPU, de la mémoire, du réseau et du stockage. Vous pouvez trier le tableau par n'importe quelle colonne en cliquant sur l'en-tête de la colonne.
2. Utiliser l'outil docker top
L'outil docker top est similaire à la commande top de Linux. Il affiche les processus en cours d'exécution dans chaque conteneur Docker, triés par utilisation du CPU. Pour l'exécuter, entrez la commande suivante dans votre terminal :
docker top <container_id>
Remplacez <container_id> par l'ID du conteneur que vous souhaitez inspecter.
3. Utiliser l'API Docker
Vous pouvez également utiliser l'API Docker pour obtenir des informations sur l'utilisation des ressources des conteneurs. Pour ce faire, vous aurez besoin d'appeler l'endpoint /stats de l'API. Vous pouvez trouver plus d'informations sur l'utilisation de l'API Docker pour surveiller les conteneurs dans la documentation officielle de Docker : https://docs.docker.com/reference/cli/docker/container/stats/
4. Utiliser un outil de supervision tiers
Il existe un certain nombre d'outils de supervision tiers qui peuvent vous aider à surveiller l'utilisation des ressources des conteneurs Docker. Ces outils peuvent vous fournir une vue plus complète de l'utilisation des ressources de vos conteneurs, ainsi que des fonctionnalités supplémentaires telles que des alertes et des rapports. Parmi les outils de supervision populaires, citons :
- Prometheus: https://developer.ibm.com/tutorials/monitoring-kubernetes-prometheus/
- Grafana: https://grafana.com/docs/grafana/latest/getting-started/
- Datadog: https://docs.datadoghq.com/getting_started/application/
- New Relic: https://newrelic.com/
Conseils supplémentaires
- Vous pouvez limiter les ressources qu'un conteneur peut utiliser en définissant des limites de CPU et de mémoire lors de la création du conteneur.
- Vous pouvez utiliser la commande
docker pspour afficher une liste des conteneurs en cours d'exécution, ainsi que leur utilisation actuelle du CPU et de la mémoire. - Vous pouvez utiliser l'option
-aavec la commandedocker statspour afficher des informations sur tous les conteneurs en cours d'exécution, y compris ceux qui sont en pause ou arrêtés.
J'espère que ces informations vous aideront à identifier le conteneur Docker qui consomme le plus de ressources sur votre système.
Build a container
https://www.youtube.com/watch?v=SnSH8Ht3MIc
Some lightweight Linux distributions commonly used in Docker containers include Alpine Linux, BusyBox, and Scratch. Alpine Linux is a popular choice due to its minimal size and package management system. Here's how you can create a Docker container using Alpine Linux:
1. **Create a Dockerfile**: Create a Dockerfile similar to the one shown below. This example uses Alpine Linux as the base image:
```Dockerfile
Use Alpine Linux as the base image
FROM alpine:latest
Install any necessary dependencies using the Alpine package manager (apk)
RUN apk update && apk add your-dependency-package
Copy your application files into the container
COPY your-application /path/to/destination/in/container
Set the working directory
WORKDIR /path/to/destination/in/container
Define the command to run your application
CMD ["/path/to/destination/in/container/your-application"]
```
Replace `your-dependency-package`, `your-application`, and the destination paths with your specific dependencies and application details.
2. **Build the Docker Image**: Navigate to the directory containing your Dockerfile and execute the following command to build the Docker image using Alpine Linux as the base image:
```bash
docker build -t my-app-image .
```
Replace `my-app-image` with your chosen image name.
3. **Run the Docker Container**: To run the Docker container using the Alpine-based image, use the following command:
```bash
docker run -d my-app-image
```
The container will use Alpine Linux as the base image, which is much lighter than Ubuntu.
Alpine Linux is known for its minimalism and small footprint, making it an excellent choice for lightweight Docker containers. You can explore other lightweight base images, such as BusyBox or Scratch, based on your specific needs and container size requirements. Keep in mind that using smaller base images may require more manual configuration of dependencies and environment setup compared to using a more feature-rich base image like Ubuntu.
To deploy a Docker container with your image and expose it on port 5234, you can use the -p (or --publish) option when running the container. Here's how you can do it:
Assuming you have already built your Docker image as mentioned earlier, you can deploy and expose the container on port 5234 using the following command:
docker run -d -p 5234:5234 my-app-image
In this command:
-
-druns the container in detached mode (in the background). -
-p 5234:5234specifies that you want to map port 5234 from the host to port 5234 inside the container. This means that any traffic directed to port 5234 on your host will be forwarded to the container.
Replace my-app-image with the name of your Docker image.
Now, your application running inside the Docker container should be accessible on port 5234 of your host machine. You can access it using a web browser or other tools by navigating to http://localhost:5234 or http://<your_host_ip>:5234, where <your_host_ip> is the IP address of your host machine.
Make sure that your application inside the Docker container is configured to listen on port 5234 for incoming requests. Additionally, if you need to use a different host port to expose the application (e.g., if port 5234 on your host is already in use), you can modify the -p option accordingly, like -p 8080:5234 to expose it on port 8080 of your host.
Force DNS change.
In my case, /etc/resolved.conf was a symlink pointing to /run/systemd/resolve/stub-resolv.conf. I could edit both but they reverted to default after a reboot.
So I did cp "/etc/resolv.conf" "/etc/resolv.conf_ORIGINAL" And edited it to my liking. For example:
#nameserver 127.0.0.53
nameserver 94.140.14.14#adguard
nameserver 94.140.15.15#adguard
options edns0 trust-ad
search .
Then I chattr +i /etc/resolv.conf to prevent any unwanted modification.
To undo, just chattr -i /etc/resolv.conf
Install dig to check:sudo apt install dnsutilsdig google.com
Créer un bot Discord pour nettoyer automatiquement les canaux d'un serveur.
Créer un bot Discord pour supprimer les messages de différents canaux est faisable avec Python et la bibliothèque discord.py. Voici un guide simple pour le mettre en place sous Debian.
Étapes pour créer et exécuter le bot
1. Créer une application Discord
- Rendez-vous sur le portail des développeurs Discord.
- Cliquez sur New Application, donnez-lui un nom, et cliquez sur Create.
- Allez dans l’onglet Bot et cliquez sur Add Bot. Confirmez.
- Sous Token, cliquez sur Copy pour sauvegarder le token du bot (gardez-le privé).
2. Activer les intentions nécessaires dans le portail Discord :
- Allez sur le portail des développeurs Discord.
- Sélectionnez votre application (le bot).
- Dans le menu de gauche, cliquez sur Bot.
- Sous Privileged Gateway Intents, activez l'option Message Content Intent.
- Cliquez sur Save Changes.
3. Inviter le bot sur votre serveur
- Sous l’onglet OAuth2 > URL Generator, cochez :
-
botdans Scopes. - Les permissions nécessaires dans Bot Permissions (par exemple,
Send Messages).
-
- Copiez l’URL générée et ouvrez-la dans votre navigateur.
- Invitez le bot sur votre serveur Discord en suivant les instructions.
4. Obtenir les IDs des canaux
Activez le Mode Développeur dans Discord (Paramètres > Avancés > Mode Développeur). Faites un clic droit sur le canal concerné et sélectionnez Copier l’identifiant.
5. Installer les dépendances
Sur votre Debian, installez Python et les bibliothèques nécessaires :
sudo apt update
sudo apt install python3 python3-pip -y
pip3 install discord.py
6. Écrire le script Python
Créez un fichier bot.py avec le contenu suivant :
import discord
from discord.ext import commands
import asyncio

# Remplacez par votre propre token
TOKEN = "VOTRE_TOKEN_ICI"
# Remplacez par les IDs des canaux ou vous souhaitez effacer des messages
CHANNEL_IDS = [123456789012345678, 987654321098765432]  # Exemple d'IDs de canaux
# Nombre maximum de messages a supprimer par execution
AMOUNT_TO_CLEAR = 100

# Initialisation du bot avec les intentions necessaires
intents = discord.Intents.default()
intents.messages = True  # Permet au bot d'interagir avec les messages
intents.message_content = True  # Necessaire pour acceder au contenu des messages
bot = commands.Bot(command_prefix="!", intents=intents)

@bot.event
async def on_ready():
    print(f"Bot connected comme {bot.user}")

    for channel_id in CHANNEL_IDS:
        channel = bot.get_channel(channel_id)
        if channel:
            try:
                # Purge des messages dans le canal
                deleted = await channel.purge(limit=AMOUNT_TO_CLEAR)
                print(f"{len(deleted)} messages supprimes dans le canal {channel_id}.")
            except discord.errors.Forbidden:
                print(f"Acces refuse pour supprimer les messages dans le canal {channel_id}.")
            except discord.errors.HTTPException as e:
                print(f"Erreur HTTP lors de la tentative de purge dans le canal {channel_id}: {e}")
        else:
            print(f"Canal avec ID {channel_id} introuvable.")

    # Arreter le bot apres l'execution de la purge
    await bot.close()

# Lancer le bot
bot.run(TOKEN)
7. Lancer le bot en arrière-plan avec nohup
Pour faire tourner le bot en arrière-plan, vous pouvez utiliser nohup pour qu'il continue à fonctionner même si vous fermez le terminal. Voici la commande à exécuter pour démarrer le bot et enregistrer les logs dans un fichier :
nohup python3 /path/to/bot.py > /path/to/bot_output.log 2>&1 &
Cette commande exécute le script en arrière-plan et redirige les sorties (logs et erreurs) vers le fichier bot_output.log.
8. Configurer une tâche cron pour redémarrer le bot chaque lundi à 5:00AM
Pour redémarrer automatiquement le bot chaque lundi à 5:00AM, vous devez configurer une tâche cron. Pour cela, éditez votre crontab :
crontab -e
Ajoutez la ligne suivante pour exécuter le bot chaque lundi à 5:00AM :
0 5 * * 1 nohup python3 /path/to/bot.py > path/to/bot_output.log 2>&1 &
nohup est optionnel puisqu'on n'execute pas le script depuis le terminal.
Cela fera en sorte que votre bot soit exécuté automatiquement chaque lundi à 5:00AM.
Conclusion
Avec ce guide, vous avez un bot Discord qui purge les messages tous les 7 jours dans les canaux de votre choix. Vous pouvez adapter le script et les paramètres selon vos besoins, et utiliser cron pour planifier l'exécution automatique du bot tous les lundis à 5:00AM.
Points importants
- Gardez votre token secret : Ne partagez jamais votre token. Si vous pensez qu'il est compromis, régénérez-le depuis le portail Discord.
- Permissions du bot : Vérifiez que le bot a bien les permissions nécessaires sur chaque canal.
- Testez localement : Assurez-vous que le script fonctionne correctement avant de l’automatiser.
Use scp to copy a file and a directory from one machine to another:
Use scp to copy a file and a directory from one machine to another:
Copying a Single File
-
Open a terminal on the source machine (Machine A).
-
Use the
scpcommand to copy the file to the destination machine (Machine B).
-
scp /path/to/source/file user@machineB:/path/to/destination//path/to/source/file: The path to the file you want to copy on Machine A.user@machineB: The username and hostname or IP address of Machine B./path/to/destination/: The path to the destination directory on Machine B.
Copying a Directory
-
Open a terminal on the source machine (Machine A).
-
Use the
scpcommand with the-roption to copy the directory to the destination machine (Machine B).
-
scp -r /path/to/source/directory user@machineB:/path/to/destination/-r: Option to copy directories recursively./path/to/source/directory: The path to the directory you want to copy on Machine A.user@machineB: The username and hostname or IP address of Machine B./path/to/destination/: The path to the destination directory on Machine B.
Example
Copying a File
Suppose you want to copy example.txt from /home/userA/documents on Machine A to /home/userB/backup on Machine B:
scp /home/userA/documents/example.txt userB@machineB:/home/userB/backup/Copying a Directory
Suppose you want to copy the entire documents directory from /home/userA/documents on Machine A to /home/userB/backup on Machine B:
scp -r /home/userA/documents userB@machineB:/home/userB/backup/My Example
scp -r /srv/dev-disk-by-uuid-76493abc-7cd4-4b00-927c-8b2bef740dd4/Video/tutos/olol/* root@192.168.1.104:/srv/dev-disk-by-uuid-7fe66601-5ca0-4c09-bc13-a015025fe53a/Files/Clipbucket/files/upload/files/mass_uploads/
Conclusion
These commands will allow you to copy a file or a directory from Machine A to Machine B using scp. Make sure to replace the placeholders with the actual paths and usernames relevant to your setup.
Gestion Automatisée des Conteneurs Docker avec Timeout et Recréation / Automated Docker Container Management with Timeout and Auto-Recreation
🎯 Objectif :
Créer un script pour :
- Lister les conteneurs actifs (sauf Portainer)
- Sauvegarder les informations essentielles (ID, nom, ports, volumes)
- Arrêter les conteneurs pour la maintenance (sans toucher à Portainer)
- Redémarrer automatiquement après 4 heures (ou sur commande)
- Recréer les conteneurs supprimés avec leurs anciens ports et volumes
Cela vous permet de gérer vos conteneurs sereinement tout en conservant l’accès à votre interface Portainer ! 🔒
🛠 Le Script : manage_containers.sh
Voici le code complet à copier :
#!/bin/bash

# Fichier pour stocker les informations des conteneurs
CONTAINER_FILE="/tmp/containers_info.txt"
TIMEOUT=14400  # 4 heures en secondes
EXCLUDED_CONTAINER="portainer"  # Conteneur à exclure de l'arrêt/redémarrage

# Fonction pour lister et sauvegarder les conteneurs avec des détails
list_and_save_containers() {
    echo "🔍 Liste des conteneurs en cours d'exécution (hors $EXCLUDED_CONTAINER)..."
    docker ps --format "{{.ID}} {{.Names}} {{.Ports}} {{.Mounts}}" | grep -v "$EXCLUDED_CONTAINER" > "$CONTAINER_FILE"

    if [[ ! -s $CONTAINER_FILE ]]; then
        echo "✅ Aucun conteneur en cours d'exécution (hors $EXCLUDED_CONTAINER)."
        exit 0
    fi

    echo "📄 Informations des conteneurs enregistrées dans : $CONTAINER_FILE"
    cat "$CONTAINER_FILE"
}

# Fonction pour arrêter les conteneurs (hors Portainer)
stop_containers() {
    echo "🛑 Arrêt des conteneurs (hors $EXCLUDED_CONTAINER)..."
    while read -r container_id container_name container_ports container_mounts; do
        if [[ "$container_name" != "$EXCLUDED_CONTAINER" ]]; then
            echo "➡️ Arrêt du conteneur : $container_name ($container_id)"
            docker stop "$container_id"
        fi
    done < "$CONTAINER_FILE"
    echo "✔️ Tous les conteneurs listés (sauf $EXCLUDED_CONTAINER) sont arrêtés."
}

# Fonction pour redémarrer ou recréer les conteneurs
restart_or_recreate_containers() {
    echo "🔁 Redémarrage ou recréation des conteneurs (hors $EXCLUDED_CONTAINER)..."
    while read -r container_id container_name container_ports container_mounts; do
        if [[ "$container_name" != "$EXCLUDED_CONTAINER" ]]; then
            # Vérifier si le conteneur existe encore
            if docker ps -a --format "{{.ID}}" | grep -q "$container_id"; then
                echo "➡️ Redémarrage du conteneur : $container_name ($container_id)"
                docker start "$container_id"
            else
                echo "⚠️ Conteneur $container_name introuvable. Recréation..."

                # Recréer le conteneur avec des options basiques
                recreate_command="docker run -d --name $container_name"

                # Ajouter les ports si présents
                if [[ -n $container_ports ]]; then
                    for port_mapping in $(echo $container_ports | tr ',' ' '); do
                        recreate_command+=" -p $port_mapping"
                    done
                fi

                # Ajouter les volumes si présents
                if [[ -n $container_mounts ]]; then
                    for volume_mapping in $(echo $container_mounts | tr ',' ' '); do
                        recreate_command+=" -v $volume_mapping"
                    done
                fi

                # Afficher la commande de recréation (l'image reste à préciser)
                echo "🔧 Commande de recréation :"
                echo "$recreate_command <image>"
                echo "❗ Remplacez '<image>' par l'image Docker d'origine pour finaliser la recréation."
            fi
        fi
    done < "$CONTAINER_FILE"
    echo "🚀 Redémarrage/recréation terminé."
}

# Exécution du script
case "$1" in
    start)
        list_and_save_containers
        stop_containers

        echo "🟠 Conteneurs arrêtés (hors $EXCLUDED_CONTAINER). Vous avez 4 heures pour effectuer votre action."
        echo "⏳ Après 4 heures, les conteneurs seront redémarrés automatiquement."

        # Délai de 4 heures
        sleep "$TIMEOUT"

        echo "⏰ Timeout atteint : redémarrage automatique des conteneurs..."
        restart_or_recreate_containers
        ;;
    restart)
        if [[ ! -f $CONTAINER_FILE ]]; then
            echo "❗ Fichier des conteneurs non trouvé. Lancez './manage_containers.sh start' d'abord."
            exit 1
        fi
        restart_or_recreate_containers
        ;;
    *)
        echo "Usage : $0 {start|restart}"
        exit 1
        ;;
esac
🚀 Comment l’utiliser :
-
Créer le script :
nano manage_containers.sh -
Donner les droits d’exécution :
chmod +x manage_containers.sh -
Lancer le processus d’arrêt et de sauvegarde :
./manage_containers.sh start -
Après votre intervention (ou après le timeout de 4h) :
- Les conteneurs sont redémarrés automatiquement.
- Si un conteneur a été supprimé, la commande de recréation s’affiche pour vous guider ! 🚨
-
Redémarrer manuellement avant le timeout :
./manage_containers.sh restart
🧠 Pourquoi stocker plus d’infos sur les conteneurs ?
On sauvegarde les :
- ID du conteneur
- Nom
- Ports exposés
- Volumes montés
➡️ Ça permet de recréer un conteneur avec sa configuration si jamais il a été supprimé par accident.
🛡️ Timeout de 4 heures :
Avec le sleep 14400, vous avez 4 heures pour faire votre maintenance avant que les conteneurs ne redémarrent tout seuls. Vous pouvez ajuster cette valeur à votre convenance.
🏁 Conclusion :
Avec ce script, vous pouvez :
✔️ Sauvegarder l’état de vos conteneurs
✔️ Arrêter les conteneurs proprement
✔️ Redémarrer automatiquement après un délai
✔️ Recréer les conteneurs supprimés avec leurs ports et volumes
✔️ Gagner du temps et réduire les erreurs lors des maintenances
C’est une base solide pour sécuriser vos déploiements Docker sur Debian ! 🐳
Here’s your article translated into English, ready to save in Bookstack! 📚 🚀
🎯 Goal:
Create a script to:
- List active containers (except Portainer)
- Save essential information (ID, name, ports, volumes)
- Stop containers for maintenance (without affecting Portainer)
- Automatically restart after 4 hours (or on command)
- Recreate deleted containers with their previous ports and volumes
This allows you to manage your containers with peace of mind while maintaining access to your Portainer interface! 🔒
🛠 The Script: manage_containers.sh
Here’s the full code to copy:
#!/bin/bash

# File to store container information
CONTAINER_FILE="/tmp/containers_info.txt"
TIMEOUT=14400  # 4 hours in seconds
EXCLUDED_CONTAINER="portainer"  # Container to exclude from stop/restart

# Function to list and save container details
list_and_save_containers() {
    echo "🔍 Listing running containers with details..."
    docker ps --format "{{.ID}} {{.Names}} {{.Ports}} {{.Mounts}}" | grep -v "$EXCLUDED_CONTAINER" > "$CONTAINER_FILE"

    if [[ ! -s $CONTAINER_FILE ]]; then
        echo "✅ No running containers (excluding $EXCLUDED_CONTAINER)."
        exit 0
    fi

    echo "📄 Container information saved to: $CONTAINER_FILE"
    cat "$CONTAINER_FILE"
}

# Function to stop containers (excluding Portainer)
stop_containers() {
    echo "🛑 Stopping containers (excluding $EXCLUDED_CONTAINER)..."
    while read -r container_id container_name container_ports container_mounts; do
        if [[ "$container_name" != "$EXCLUDED_CONTAINER" ]]; then
            echo "➡️ Stopping container: $container_name ($container_id)"
            docker stop "$container_id"
        fi
    done < "$CONTAINER_FILE"
    echo "✔️ All listed containers (except $EXCLUDED_CONTAINER) stopped."
}

# Function to restart or recreate containers
restart_or_recreate_containers() {
    echo "🔁 Restarting or recreating containers (excluding $EXCLUDED_CONTAINER)..."
    while read -r container_id container_name container_ports container_mounts; do
        if [[ "$container_name" != "$EXCLUDED_CONTAINER" ]]; then
            # Check if the container still exists
            if docker ps -a --format "{{.ID}}" | grep -q "$container_id"; then
                echo "➡️ Restarting container: $container_name ($container_id)"
                docker start "$container_id"
            else
                echo "⚠️ Container $container_name not found. Recreating..."

                # Recreate the container with basic options
                recreate_command="docker run -d --name $container_name"

                # Add ports if present
                if [[ -n $container_ports ]]; then
                    for port_mapping in $(echo $container_ports | tr ',' ' '); do
                        recreate_command+=" -p $port_mapping"
                    done
                fi

                # Add volumes if present
                if [[ -n $container_mounts ]]; then
                    for volume_mapping in $(echo $container_mounts | tr ',' ' '); do
                        recreate_command+=" -v $volume_mapping"
                    done
                fi

                # Show the recreation command (image needs to be specified)
                echo "🔧 Recreation command:"
                echo "$recreate_command <image>"
                echo "❗ Replace '<image>' with the original Docker image to complete the recreation."
            fi
        fi
    done < "$CONTAINER_FILE"
    echo "🚀 Restart/recreation complete."
}

# Script execution
case "$1" in
    start)
        list_and_save_containers
        stop_containers

        echo "🟠 Containers stopped (excluding $EXCLUDED_CONTAINER). You have 4 hours to complete your action."
        echo "⏳ After 4 hours, containers will restart automatically."

        # 4-hour timeout
        sleep "$TIMEOUT"

        echo "⏰ Timeout reached: Automatically restarting containers..."
        restart_or_recreate_containers
        ;;
    restart)
        if [[ ! -f $CONTAINER_FILE ]]; then
            echo "❗ Container file not found. Run './manage_containers.sh start' first."
            exit 1
        fi
        restart_or_recreate_containers
        ;;
    *)
        echo "Usage: $0 {start|restart}"
        exit 1
        ;;
esac
🚀 How to Use It:
-
Create the script:
nano manage_containers.sh -
Make it executable:
chmod +x manage_containers.sh -
Start the process to stop and save containers:
./manage_containers.sh start -
After your maintenance (or after the 4-hour timeout):
- Containers restart automatically.
- If a container was deleted, a recreation command appears to help you restore it! 🚨
-
Restart manually before the timeout:
./manage_containers.sh restart
🧠 Why Save More Container Info?
We save:
- Container ID
- Name
- Exposed ports
- Mounted volumes
➡️ This lets you recreate a container with its configuration if it gets deleted.
🛡️ 4-Hour Timeout:
With sleep 14400, you get 4 hours to perform maintenance before containers automatically restart. You can change this value to fit your needs.
🏁 Conclusion:
With this script, you can:
✔️ Save container state
✔️ Stop containers safely
✔️ Automatically restart after a delay
✔️ Recreate deleted containers with their ports and volumes
✔️ Save time and avoid errors during maintenance
It’s a solid base to secure your Docker deployments on Debian! 🐳
Automatiser la Synchronisation entre Deux Serveurs avec rsync et SSH
Ce guide explique pas à pas comment synchroniser automatiquement un dossier entre deux machines (Machine A → Machine B) en utilisant rsync via une connexion sécurisée SSH.
Étape 1 : Générer une paire de clés SSH sur la Machine A
On crée une paire de clés (privée/publique) qui permettra à la Machine A de se connecter à la Machine B sans mot de passe.
Commande de génération
ssh-keygen -t rsa -b 4096 -C "votre_email@example.com"-
-t rsa→ type de clé RSA. -
-b 4096→ longueur de clé (4096 bits, sécurisé). -
-C→ commentaire associé à la clé (souvent l’email).
Où sont créés les fichiers ?
-
Quand la commande te demande :
Enter file in which to save the key (/home/user/.ssh/id_rsa):-
Si tu appuies Entrée → les fichiers sont créés dans le chemin indiqué entre parenthèses (par défaut
~/.ssh/id_rsaet~/.ssh/id_rsa.pub). -
Si tu entres juste un nom (ex.
ma-cle) → les fichiers seront créés dans le dossier courant (./ma-cleet./ma-cle.pub). -
Si tu donnes un chemin complet (
~/.ssh/serveurX) → ils seront créés exactement là (~/.ssh/serveurXet~/.ssh/serveurX.pub).
-
👉 Bonne pratique : indiquer directement un chemin clair, par exemple :
ssh-keygen -t rsa -b 4096 -C "votre_email@example.com" -f ~/.ssh/machineBTu auras alors :
-
clé privée →
~/.ssh/machineB(à garder secrète, chmod 600). -
clé publique →
~/.ssh/machineB.pub(celle à partager).
Étape 2 : Copier la clé publique sur la Machine B
La clé publique doit être ajoutée dans le fichier ~/.ssh/authorized_keys de l’utilisateur cible sur la Machine B.
La commande la plus simple est :
ssh-copy-id -i ~/.ssh/machineB.pub user@100.100.10.100Explications
-
-i ~/.ssh/machineB.pub→ précise explicitement quelle clé publique copier (important si tu en as plusieurs). -
user@100.100.10.100→ utilisateur et IP/nom de la Machine B. -
Cette commande va :
-
ouvrir une connexion SSH (tu devras saisir ton mot de passe une dernière fois)
-
créer
~/.ssh/authorized_keyssi besoin -
ajouter la clé publique à ce fichier.
-
Après ça, la Machine A pourra se connecter sans mot de passe.
Vérifier la connexion
Teste immédiatement :
ssh -i ~/.ssh/machineB user@100.100.10.100Si tout est correct, tu entres directement sans mot de passe.
👉 Si tu as plusieurs clés sur ta Machine A, il est recommandé de préciser laquelle utiliser, soit avec -i, soit en configurant ~/.ssh/config :
Host machineB
  HostName 100.100.10.100
  User user
  IdentityFile ~/.ssh/machineB
  IdentitiesOnly yes
Tu pourras ensuite faire simplement :
ssh machineBÉtape 3 : Programmer la synchronisation avec cron et rsync
rsync permet de synchroniser efficacement un dossier d’une machine vers une autre.
Test manuel avant tout
rsync -avz --progress /srv/path/to/folder/ user@100.100.10.100:/srv/Folder/-
-a→ mode archive (préserve permissions, liens, etc.). -
-v→ verbose, affiche les fichiers transférés. -
-z→ compresse les données pendant le transfert. -
--progress→ montre l’avancement.
⚠️ Vérifie bien que la commande fonctionne manuellement avant de l’automatiser.
Planification avec cron
Ouvre l’éditeur de tâches planifiées sur la Machine A :
crontab -eAjoute la ligne suivante pour exécuter la synchro chaque dimanche à 2h du matin :
0 2 * * 0 rsync -avz /srv/path/to/folder/ user@100.100.10.100:/srv/Folder/-
0 2 * * 0→ tous les dimanches à 2h. -
Le chemin
/srv/path/to/folder/→ source sur Machine A. -
Le chemin
user@100.100.10.100:/srv/Folder/→ destination sur Machine B.
Étape 4 : Vérification
-
Lister les tâches cron actives :
crontab -l-
Vérifier les logs (
/var/log/syslogoujournalctl -u cron) si la tâche ne tourne pas. -
Tester à la main :
rsync -avz --progress /srv/path/to/folder/ user@100.100.10.100:/srv/Folder/✅ Résumé des bonnes pratiques
-
Toujours savoir où la clé est enregistrée lors de
ssh-keygen. -
Utiliser
-iavecssh-copy-idsi tu as plusieurs clés. -
Vérifier les permissions :
-
~/.ssh→chmod 700 -
clé privée →
chmod 600 -
clé publique →
chmod 644 -
authorized_keyssur Machine B →chmod 600
-
-
Toujours tester manuellement
rsyncavant de l’ajouter àcron.
👉 Avec cette méthode, ta Machine A synchronisera automatiquement son dossier vers la Machine B chaque semaine, de manière sécurisée et sans mot de passe.
Automatiser la Synchronisation entre Deux Serveurs avec rsync et SSH AVEC VERSIONING
Voici un tuto complet, clair et corrigé, intégrant toutes les leçons tirées de ton expérience : pas d’accents, chemin de clef SSH précisé, création automatique des dossiers, rotation quotidienne/hebdo/mensuelle.
1️⃣ Objectif
Ce guide explique comment synchroniser automatiquement le contenu d’un dossier sur une Machine A vers une Machine B avec :
-
Versioning : daily / weekly / monthly
-
Rotation : suppression automatique des anciennes versions
-
Connexion SSH sans mot de passe
Exemple : copier /srv/Files/ de Machine A vers /srv/Backup/Shuttle/ sur Machine B.
2️⃣ Prérequis
-
Machine A et Machine B accessibles via SSH
-
Rsync installé sur Machine A et Machine B
-
Clé SSH configurée pour un accès sans mot de passe
3️⃣ Etape 1 : Generer une clé SSH sur Machine A
-
Sur Machine A, genere une clé SSH (sans mot de passe pour l’automatisation) :
ssh-keygen -t rsa -b 4096 -f ~/.ssh/shuttle_key -C "backup"-
Copier la clé publique sur Machine B :
ssh-copy-id -i ~/.ssh/shuttle_key root@IP_MACHINE_B-
Tester la connexion :
ssh -i ~/.ssh/shuttle_key root@IP_MACHINE_B-
Tu ne dois plus avoir de demande de mot de passe.
4️⃣ Etape 2 : Préparer les dossiers sur Machine B
-
Rsync a besoin que les dossiers parents existent pour créer les sous-dossiers datés.
-
Sur Machine B, crée les dossiers :
ssh -i ~/.ssh/shuttle_key root@IP_MACHINE_B "mkdir -p /srv/Backup/Shuttle/daily /srv/Backup/Shuttle/weekly /srv/Backup/Shuttle/monthly"5️⃣ Etape 3 : Script de backup automatisé
Crée un fichier /home/scripts/backup/backup_rsync_to_alphavps.sh sur Machine A :
#!/bin/bash
# Backup rsync avec rotation journalière, hebdo, mensuelle
export PATH=/usr/local/sbin:/usr/local/bin:/usr/sbin:/usr/bin:/sbin:/bin

# Variables A EDITER !!
SRC="/srv/Files/"
REMOTE_USER="root"
REMOTE_HOST="192.168.1.104"
REMOTE="$REMOTE_USER@$REMOTE_HOST"
REMOTE_BASE="/srv/dev-disk-by-uuid-2da450f2-4dde-4234-8a5a-2011f9145fee/Backup/Shuttle"
SSH_KEY="/root/.ssh/shuttle-transporter"
#
TODAY=$(date +%Y-%m-%d)
WEEK=$(date +%Y-%V)
MONTH=$(date +%Y-%m)

# Exclusions (si besoin)
EXCLUDES=( "--exclude=QBittorrentVPN/downloads/" )

create_remote_dirs() {
    ssh -i "$SSH_KEY" "$REMOTE" "mkdir -p $REMOTE_BASE/daily $REMOTE_BASE/weekly $REMOTE_BASE/monthly"
}

backup() {
    local TYPE=$1
    local NAME=$2
    local DEST_DIR="${REMOTE_BASE}/${TYPE}/${NAME}"      # chemin côté distant (absolu)
    local DEST_RSYNC="${REMOTE}:${DEST_DIR}"            # destination Rsync (user@host:/path)

    # trouver la dernière sauvegarde côté distant
    local LAST_BACKUP
    LAST_BACKUP=$(ssh -i "$SSH_KEY" "$REMOTE" "ls -1t $REMOTE_BASE/$TYPE 2>/dev/null | head -n 1" || true)

    echo "Backup $TYPE -> $DEST_RSYNC (link-dest -> $LAST_BACKUP)"

    if [ -n "$LAST_BACKUP" ]; then
        # link-dest doit être un chemin tel qu'il est vu sur la machine distante
        rsync -aHvz -e "ssh -i $SSH_KEY" \
            --delete \
            "${EXCLUDES[@]}" \
            --link-dest="$REMOTE_BASE/$TYPE/$LAST_BACKUP" \
            "$SRC" "$DEST_RSYNC"
    else
        rsync -aHvz -e "ssh -i $SSH_KEY" \
            --delete \
            "${EXCLUDES[@]}" \
            "$SRC" "$DEST_RSYNC"
    fi

    # mettre à jour le mtime du dossier de backup pour éviter qu'il soit considéré comme "ancien"
    ssh -i "$SSH_KEY" "$REMOTE" "mkdir -p '$DEST_DIR' && touch '$DEST_DIR'"
}

rotate() {
    local TYPE=$1
    local MAX_AGE=$2

    echo "Rotation $TYPE : suppression des backups plus vieux que $MAX_AGE jours..."
    ssh -i "$SSH_KEY" "$REMOTE" "find '$REMOTE_BASE/$TYPE' -mindepth 1 -maxdepth 1 -type d -mtime +$MAX_AGE -print -exec rm -rf {} \;"
}

# run
create_remote_dirs

backup "daily" "$TODAY"

if [ "$(date +%u)" -eq 7 ]; then
    backup "weekly" "$WEEK"
fi

if [ "$(date +%d)" -eq 1 ]; then
    backup "monthly" "$MONTH"
fi

rotate "daily" 7
rotate "weekly" 28
rotate "monthly" 90

echo "Backup termine."
-
Remplace
IP_MACHINE_Bpar l’IP réelle de la machine B. -
Vérifie que le chemin de la clé SSH correspond à celui généré (
~/.ssh/shuttle_key). -
Le script supprime automatiquement les versions dépassant le quota.
6️⃣ Etape 4 : Rendre le script exécutable
chmod +x /home/scripts/backup/backup_rsync_to_alphavps.sh7️⃣ Etape 5 : Test manuel
/bin/bash /home/scripts/backup/backup_rsync_to_alphavps.sh-
Vérifie que les dossiers datés sont créés sur Machine B.
-
Aucun mot de passe ne doit être demandé.
8️⃣ Etape 6 : Automatisation avec cron
-
Exemple : lancer le script tous les jours à 3h :
0 3 * * * /bin/bash /home/scripts/backup/backup_rsync_to_alphavps.sh-
Avec cette configuration :
-
Backup quotidien →
daily/YYYY-MM-DD -
Backup hebdo →
weekly/YYYY-WW -
Backup mensuel →
monthly/YYYY-MM -
Rotation automatique des anciennes versions
-
✅ Résultat :
-
Copie incrémentielle avec rsync
-
Versioning daily/weekly/monthly
-
Rotation automatique
-
Script robuste pour cron, sans accents ni caractères spéciaux
-
Connexion SSH sécurisée et sans mot de passe
Liste des sous dossiers d'un dossier en .txt sous windows
Ce tutoriel vous guide à travers la création d'un script PowerShell pour lister les dossiers d'un répertoire donné, triés par ordre naturel.
Prérequis
- Un ordinateur avec Windows.
- PowerShell installé (généralement inclus par défaut sur les systèmes Windows modernes).
Étapes
Une fois dans le dossier contenant les sous-dossiers à lister:
-
Ouvrir un éditeur de texte
- Ouvrez le Bloc-notes ou tout autre éditeur de texte de votre choix.
-
Copier le script PowerShell
- Copiez le script suivant dans l'éditeur de texte :
# Chemin du dossier source
$sourcePath = "D:\Chemin\vers\le\dossier"

# Vérifier si le chemin existe
if (Test-Path -Path $sourcePath) {
    # Récupérer la liste des dossiers
    $folders = Get-ChildItem -Path $sourcePath -Directory | Select-Object -ExpandProperty Name

    # Fonction de tri naturel simplifiée
    $sortedFolders = $folders | Sort-Object {
        $numPattern = '\d+'
        $numMatches = [regex]::Matches($_, $numPattern)
        $numValue = 0
        if ($numMatches.Count -gt 0) {
            $numValue = [int]$numMatches[0].Value
        }
        $numValue
    }

    # Chemin du fichier de sortie
    $outputFile = Join-Path -Path $sourcePath -ChildPath "liste_dossiers.txt"

    # Écrire les noms des dossiers triés dans le fichier
    $sortedFolders | Out-File -FilePath $outputFile

    Write-Host "La liste des dossiers a été enregistrée dans $outputFile"
} else {
    Write-Host "Le chemin spécifié n'existe pas : $sourcePath"
}
-
Enregistrer le script
- Enregistrez le fichier avec une extension
.ps1, par exempletrier_dossiers.ps1.
- Enregistrez le fichier avec une extension
-
Exécuter le script
Clic droit puis executer avec Powershell
Ou:
- Ouvrez PowerShell en tant qu'administrateur.
- Naviguez jusqu'au répertoire où vous avez enregistré le script en utilisant la commande
cd. - Exécutez le script en tapant
.\trier_dossiers.ps1.
- Vérifier le résultat
- Après l'exécution du script, un fichier nommé
liste_dossiers.txtsera créé dans le répertoire spécifié, contenant la liste des dossiers triés par ordre naturel.
- Après l'exécution du script, un fichier nommé
Remarques
- Assurez-vous que l'exécution des scripts PowerShell est autorisée sur votre système. Si ce n'est pas le cas, vous pouvez autoriser l'exécution des scripts en utilisant la commande suivante dans PowerShell en tant qu'administrateur :
Set-ExecutionPolicy RemoteSigned
- Ce script suppose que les noms de dossiers contiennent des numéros pour le tri naturel. Ajustez le chemin
$sourcePathselon votre besoin.
En suivant ces étapes, vous devriez être en mesure de trier et lister les dossiers de manière naturelle avec PowerShell.
Le même mais sans rien devant le nom des dossiers:
# Chemin du dossier source
$sourcePath = "D:\Chemin\vers\le\dossier"

# Vérifier si le chemin existe
if (Test-Path -Path $sourcePath) {
    # Récupérer la liste des dossiers
    $folders = Get-ChildItem -Path $sourcePath -Directory | Select-Object -ExpandProperty Name

    # Fonction de tri naturel simplifiée (par le premier nombre trouvé)
    $sortedFolders = $folders | Sort-Object {
        $numPattern = '\d+'
        $numMatches = [regex]::Matches($_, $numPattern)
        $numValue = 0
        if ($numMatches.Count -gt 0) {
            $numValue = [int]$numMatches[0].Value
        }
        $numValue
    }

    # Supprimer le numéro + tiret en début de nom
    $cleanedFolderNames = $sortedFolders | ForEach-Object {
        $_ -replace '^\d+\s*-\s*', ''
    }

    # Chemin du fichier de sortie
    $outputFile = Join-Path -Path $sourcePath -ChildPath "liste_dossiers.txt"

    # Écrire les noms des dossiers nettoyés dans le fichier
    $cleanedFolderNames | Out-File -FilePath $outputFile -Encoding UTF8

    Write-Host "La liste des dossiers a été enregistrée dans $outputFile"
} else {
    Write-Host "Le chemin spécifié n'existe pas : $sourcePath"
}
Synchroniser automatiquement Radicale et Nextcloud avec un script Bash
Radicale et Nextcloud sont deux solutions populaires pour gérer ses calendriers.
-
Radicale est un serveur CalDAV léger, idéal pour héberger ses agendas en local ou sur un petit serveur.
-
Nextcloud est une plateforme cloud complète qui intègre entre autres la gestion des calendriers via CalDAV.
Dans certains cas, on souhaite synchroniser automatiquement les fichiers .ics de Radicale vers Nextcloud : par exemple pour bénéficier de l’interface web conviviale de Nextcloud tout en continuant à utiliser Radicale comme serveur principal.
Cet article présente un script Bash qui automatise cette synchronisation et explique comment le mettre en place.
1. Le principe
Le script a pour objectif de :
-
Lister les fichiers
.icsprésents dans Radicale pour un utilisateur donné. -
Comparer avec le contenu déjà présent dans Nextcloud via WebDAV.
-
Supprimer côté Nextcloud les fichiers qui n’existent plus côté Radicale.
-
Uploader (mettre à jour ou ajouter) les fichiers
.icsde Radicale vers Nextcloud.
Résultat : les calendriers de Nextcloud deviennent une copie fidèle des calendriers Radicale, mis à jour automatiquement chaque nuit (ou selon la planification définie dans cron).
2. Le script Bash
Voici le script complet :
#!/bin/bash

# === À PERSONNALISER ===

# Répertoire racine des calendriers Radicale
RADICALE_ROOT="/srv/Files/Radicale/data/collections/collection-root/user/"

# Ton utilisateur Nextcloud
NEXTCLOUD_USER="user"

# Ton mot de passe ou token d'application Nextcloud
NEXTCLOUD_PASS="TOKEN"

# Hôte Nextcloud (ex: cloud.exemple.com)
NEXTCLOUD_HOST="cloud.exemple.com"

# Liste des calendriers à synchroniser (Radicale|Nextcloud)
CALENDARS=(
  "cal1|cal-1"
  "cal2|cal-2"
  "cal3|cal-3"
  "cal4|cal-4"
  "cal5|cal-5"
)

# =========================

for calendar in "${CALENDARS[@]}"; do
    RADICAL_NAME="${calendar%%|*}"
    NEXTCLOUD_NAME="${calendar##*|}"

    echo "Synchronisation du calendrier : $RADICAL_NAME --> $NEXTCLOUD_NAME"

    RADICAL_CAL_DIR="$RADICALE_ROOT/$RADICAL_NAME"
    NEXTCLOUD_URL="https://$NEXTCLOUD_HOST/remote.php/dav/calendars/$NEXTCLOUD_USER/$NEXTCLOUD_NAME"

    if [[ ! -d "$RADICAL_CAL_DIR" ]]; then
        echo "Dossier introuvable : $RADICAL_CAL_DIR — Ignore."
        continue
    fi

    # Liste des fichiers locaux
    declare -A local_files
    for ics_file in "$RADICAL_CAL_DIR"/*.ics; do
        if [[ -f "$ics_file" ]]; then
            file_name=$(basename "$ics_file")
            local_files["$file_name"]=1
        fi
    done

    # Récupération des fichiers distants
    echo "Recuperation des fichiers existants depuis Nextcloud..."
    remote_files=$(curl -s -u "$NEXTCLOUD_USER:$NEXTCLOUD_PASS" -X PROPFIND \
        -H "Depth: 1" "$NEXTCLOUD_URL" | grep -oP '(?<=<d:href>).*?\.ics(?=</d:href>)' | sed 's|.*/||')

    for remote_file in $remote_files; do
        if [[ -z "${local_files[$remote_file]}" ]]; then
            echo "Suppression distante : $remote_file"
            curl -s -u "$NEXTCLOUD_USER:$NEXTCLOUD_PASS" -X DELETE \
                "$NEXTCLOUD_URL/$remote_file" \
                || echo "Erreur lors de la suppression de $remote_file"
        fi
    done

    # Upload des fichiers locaux
    for ics_file in "$RADICAL_CAL_DIR"/*.ics; do
        if [[ -f "$ics_file" ]]; then
            FILE_NAME=$(basename "$ics_file")
            echo "Upload : $FILE_NAME"

            curl -s -X PUT -u "$NEXTCLOUD_USER:$NEXTCLOUD_PASS" \
                 -T "$ics_file" \
                 "$NEXTCLOUD_URL/$FILE_NAME" \
                 || echo "Erreur lors de l'envoi de $FILE_NAME"
        fi
    done

    echo "Termine pour $RADICAL_NAME"
    echo ""
done

echo "Synchronisation complete."
3. Pré-requis
Avant de lancer ce script, il faut :
-
Avoir un serveur Radicale fonctionnel avec des calendriers stockés dans un répertoire
.ics. -
Avoir un compte Nextcloud avec la gestion des calendriers activée.
-
Créer un token d’application dans Nextcloud (plutôt que d’utiliser directement son mot de passe).
-
Installer curl sur le système qui exécutera le script.
4. Configuration du script
Les variables principales à personnaliser sont :
-
RADICALE_ROOT: chemin vers le répertoire où Radicale stocke les.ics. -
NEXTCLOUD_USERetNEXTCLOUD_PASS: ton utilisateur Nextcloud et son mot de passe (ou mieux : un token d’application). -
NEXTCLOUD_HOST: ton domaine Nextcloud (par ex.cloud.exemple.com). -
CALENDARS: la correspondance entre les noms des calendriers Radicale et Nextcloud ("Nom_Radicale|Nom_Nextcloud").
5. Automatiser avec cron
Pour exécuter la synchronisation chaque nuit à 3h du matin, ajoute cette ligne à la crontab (crontab -e) :
0 3 * * * /bin/bash /home/Radicale_to_Nextcloud/radicale_to_nextcloud.sh
Ainsi, tes calendriers Radicale seront automatiquement poussés vers Nextcloud sans intervention manuelle.
6. Avantages et limites
✅ Avantages :
-
Pas besoin de configurer une double synchro CalDAV.
-
Nextcloud reçoit une copie exacte des fichiers
.icsde Radicale. -
Automatisation complète grâce à
cron.
⚠️ Limites :
-
C’est une synchronisation unidirectionnelle (Radicale → Nextcloud). Toute modification faite directement dans Nextcloud sera écrasée.
-
Le script ne gère pas les conflits de modification.
Conclusion
Ce script Bash est une solution simple et efficace pour synchroniser automatiquement ses calendriers Radicale vers Nextcloud. En planifiant son exécution via cron, tu bénéficies de la puissance de Radicale et de l’ergonomie de Nextcloud, sans avoir à gérer les manipulations manuelles de fichiers .ics.
How to Rename a File Using Its Inode on Debian
Below is a clean, step‑by‑step guide that shows how to locate a file’s inode and rename it (or copy it under a new name) without knowing the exact filename.
1️⃣ Go to the Directory Containing the Target File
cd /path/to/directory/
Tip: You can also run commands from any directory; just adjust the paths accordingly.
2️⃣ List Inodes of All Files in that Directory
ls -i
The output will look like:
1234567  file_to_rename.txt
2345678  another_file.docx
...
The number on the left (
1234567in this example) is the inode.
3️⃣ Rename (or Copy) the File Using Its Inode
Option A – Rename directly (no copy):
find . -inum 1234567 -type f -exec mv {} new_name.txt \;
Option B – Copy to a new name, then optionally delete the original:
# Copy only
find . -inum 1234567 -type f -exec cp {} new_name.txt \;

# (Optional) Remove the old file after copying
find . -inum 1234567 -type f -delete
Explanation
find .– search in the current directory.-inum 1234567– match the inode you identified.-type f– ensure it’s a regular file.-exec … \;– run the command (mvorcp) on each matched file.
✅ Verify the Result
ls -i new_name.txt
You should see that the inode matches the original (unless you copied to another filesystem, in which case it will be a new inode).
Quick Summary
| Step | Command |
|---|---|
| 1 | cd /path/to/directory/ |
| 2 | ls -i |
| 3a | find . -inum <inode> -type f -exec mv {} new_name.txt \; |
| 3b | find . -inum <inode> -type f -exec cp {} new_name.txt \; (then delete if desired) |
Feel free to copy this guide or adapt it for scripts, automation, or teaching purposes. Happy file‑manipulating!